


In this blog, you will learn how to build the REST API with NestJS and Prisma for building a web app like Medium. First, we will have to start creating a new NestJS project for this. Then we will begin to our PostgreSQL server and connect it with Prisma. And at the end, we will build a REST API and document it with Swagger.
We will be using the following technologies:
Prisma as ORM – Object-Relational Mapper
NestJS as a backend framework (for backend development)
For databases, PostgreSQL
For the API documentation tool, Swagger
Typescript as a programming language
Before starting this method, make sure you have everything installed as stated above for backend development and require basic knowledge of TypeScript with NestJS.
Let's start building!
Explore- REST vs gRPC- Which is the best API Protocol?
Generating the NestJS Project
It is the first step in installing NestJS CLI. In the NestJS project, NestJS CLI is beneficial, easy to use, and mostly used for backed development projects. It helps you to initialize, develop, and maintain the NestJS app. So, let's start by creating an empty project first. Run the below command in the location where you want to complete the project.
npx @nestjs/cli new median
CLI will show you how to choose a package manager for your project. Select npm. Now you have a new directory, "NestJS project," in the live directory. If you use VSCode, you can open the project in that copy editor; you will see files like the below:
median
  ├── node_modules
  ├── src
  │   ├── app.controller.spec.ts
  │   ├── app.controller.ts
  │   ├── app.module.ts
  │   ├── app.service.ts
  │   └── main.ts
  ├── test
  │   ├── app.e2e-spec.ts
  │   └── jest-e2e.json
  ├── README.md
  ├── nest-cli.json
  ├── package-lock.json
  ├── package.json
  ├── tsconfig.build.json
  └── tsconfig.json
The Src directory will be the directory where most of the code will reside. Src/app.module.ts is the root module of the app. Src.app.controller.ts is a primary controller with an on-the route. The route will return a message "hello world." Src/main.ts is the app's entry point and starts the NestJS app.
Now you can launch the project with the below command:
npm run start:dev
Creating a PostgreSQL instance
PostgreSQl is a database for the NestJS app. So now, let's install and run PostgreSQL on the computer by a Docker container.
First, make a docker-compose.yml file in the main project folder:
touch docker-compose.yml
The instructions for running a Docker container with a PostgreSQL setup inside are contained in this docker-compose.yml configuration file. Inside the file, create the following configuration:
# docker-compose.yml

version: '3.8'
services:

  postgres:
    image: postgres:13.5
    restart: always
    environment:
      - POSTGRES_USER=myuser
      - POSTGRES_PASSWORD=mypassword
    volumes:
      - postgres:/var/lib/postgresql/data
    ports:
      - '5432:5432'

volumes:
  postgres:
Verify that your machine's port 5432 is not currently being used by anything. Now, open a new terminal window, and then run the following command in your project's main folder to launch the postgres container:
docker-compose up
The new terminal window should display logs indicating that the database system is prepared to receive connections if everything goes according to plan. In the terminal window, you ought to see the following logs:
...
postgres_1 | 2022-03-05 12:47:02,410 UTC [1] LOG: listening on IPv4 address "0.0.0.0", port $432
postgres_1 | 2022-03-05 12:47:02.410 UTC [1] LOG: listening on IPV6 address *::", port 5432
postgres_1 | 2022-03-05 12:47:02.411 UTC [1] LOG: listening on Unix sockat "/var/run/postgresql/.s. PGSQL.5432"
postgres_1 | 2022-03-05 12:47:02.419 UTC [1] LOG: database system is ready to accept connections
Wow, we just installed the PostgreSQL database!!! Now let's set up Prisma.
Setting Up Prisma
Starting Prisma Install the "Prisma CLI" as a development dependency to get going. Using the Prisma CLI, you can interact with your project and run different commands.
npm install -D prisma
You can start Prisma in your project by using the below command:
npx prisma init
It will make a new directory named **"prisma" **with a file schema.prisma file. Your database schema is contained in this file, which is the main configuration file. This command inside your project also creates a .env file.
Setting Up Environment Variable
You should find a Database URL environment variable with a fake connection string inside the .env file. Substitute the connection string for your PostgreSQL instance in place of this one.
// .env
DATABASE_URL="postgres://myuser:mypassword@localhost:5432/median-db"
Model the Data
Now, for your app, let's define the data models. You will need an Article model to represent each article on the blog. (I am reminding you that we are creating a medium website clone 😊)
In the file prisma/prisma.schema, add a new model named "article" like below:
// prisma/schema.prisma

model Article {
  id          Int      @id @default(autoincrement())
  title       String   @unique
  description String?
  body        String
  published   Boolean  @default(false)
  createdAt   DateTime @default(now())
  updatedAt   DateTime @updatedAt
}
Each field has a name like an id, title, and types like Int and String. There are also optional attributes; fields can be made optional by adding "?". Now let's migrate the database.
Migrating the Database
Now let's run migrations to create the tables. Migrations will be created in the database. To make and start the first migration, run the below command:
npx prisma migrate dev --name "init"
This command will save the migration, execute the migration, and generate the Prisma client. If the command is successfully done, you will see a message like the one below:
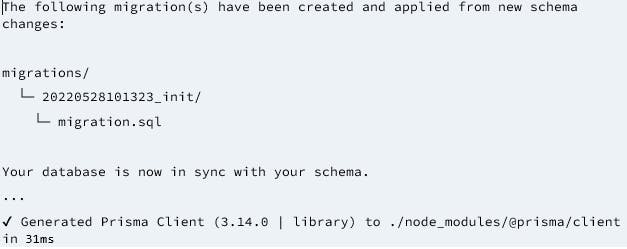
You can check the migration file to see what Prisma Migrate is doing.
-- prisma/migrations/20220528101323_init/migration.sql
-- CreateTable
CREATE TABLE "Article" (
    "id" SERIAL NOT NULL,
    "title" TEXT NOT NULL,
    "description" TEXT,
    "body" TEXT NOT NULL,
    "published" BOOLEAN NOT NULL DEFAULT false,
    "createdAt" TIMESTAMP(3) NOT NULL DEFAULT CURRENT_TIMESTAMP,
    "updatedAt" TIMESTAMP(3) NOT NULL,

    CONSTRAINT "Article_pkey" PRIMARY KEY ("id")
);
-- CreateIndex
CREATE UNIQUE INDEX "Article_title_key" ON "Article"("title");
To create the Article table in your PostgreSQL database, use the following SQL. Based on your Prisma schema, it was generated and executed automatically by Prisma.
That database is empty, so we will create a script to seed the data. The script will populate the database with a few amounts of dummy data.
First, create a scene, prisma/seed.ts. The file will have dummy data and some queries to seed the database.
Add the following code inside the prisma/seed.ts file.
// prisma/seed.ts

import { PrismaClient } from '@prisma/client';

// initialize Prisma Client
const prisma = new PrismaClient();

async function main() {
  // create two dummy articles
  const post1 = await prisma.article.upsert({
    where: { title: 'Prisma Adds Support for MongoDB' },
    update: {},
    create: {
      title: 'Prisma Adds Support for MongoDB',
      body: 'Support for MongoDB has been one of the most requested features since the initial release of...',
      description:
        "We are excited to share…",
      published: false,
    },
  });

  const post2 = await prisma.article.upsert({
    where: { title: "What's new in Prisma? (Q1/22)" },
    update: {},
    create: {
      title: "What's new in Prisma? (Q1/22)",
      body: 'Our engineers have been working hard, issuing new releases with many improvements...',
      description:
        'Learn about everything…
      published: true,
    },
  });

  console.log({ post1, post2 });
}

// execute the main function
main()
  .catch((e) => {
    console.error(e);
    process.exit(1);
  })
  .finally(async () => {
    // close Prisma Client at the end
    await prisma.$disconnect();
  });
Prisma Client is first initialized within this script. The prisma.upsert() function is then used to produce two articles. If no article matches the where condition, the upsert function will only produce a new article. Because an upsert query eliminates errors caused by accidentally attempting to insert the same record more than once, you are using it instead of a create query.
You must tell Prisma what script to execute during the seeing command. You can add the prisma.seed key at the end of the code in the package.json file.
// package.json

// ...
  "scripts": {
    // ...
  },
  "dependencies": {
    // ...
  },
  "devDependencies": {
    // ...
  },
  "jest": {
    // ...
  },
+  "prisma": {
+    "seed": "ts-node prisma/seed.ts"
+  }
Now, execute the script with the below command:
npx prisma db seed
You will see the following output below:
Running seed command `ts-node prisma/seed.ts` ...
{
  post1: {
    id: 1,
    title: 'Prisma Adds Support for MongoDB',
    description: "We are excited to share that today's Prisma ORM release adds stable support for MongoDB!",
    body: 'Support for MongoDB has been one of the most requested features since the initial release of...',
    published: false,
    createdAt: 2022-04-24T14:20:27.674Z,
    updatedAt: 2022-04-24T14:20:27.674Z
  },
  post2: {
    id: 2,
    title: "What's new in Prisma? (Q1/22)",
    description: 'Learn about everything in the Prisma ecosystem and community from January to March 2022.',
    body: 'Our engineers have been working hard, issuing new releases with many improvements...',
    published: true,
    createdAt: 2022-04-24T14:20:27.705Z,
    updatedAt: 2022-04-24T14:20:27.705Z
  }
}
🌱  The seed command has been executed.
Creating a Prisma Service
In the NestJS app, it is a good practice to move away from the Prisma Client API app. To do it, we will create a new service with a Prisma Client. The service will be called "PrismaService." CLI of Nest generates modules and services directly, so you will only have to run commands in our terminal like the below:
npx nest generate module prisma
npx nest generate service prisma
It will generate a new subdirectory ./src/prisma with files prisma.module.ts and prisma.service.ts. You will have to update prisma.service.ts file like the below code:
// src/prisma/prisma.service.ts

import { INestApplication, Injectable } from '@nestjs/common';
import { PrismaClient } from '@prisma/client';

@Injectable()
export class PrismaService extends PrismaClient {
  async enableShutdownHooks(app: INestApplication) {
    this.$on('beforeExit', async () => {
      await app.close();
    });
  }
}
To allow sharing of service to the app, add PrismaService to the exports array in the file prisma.module.ts.
// src/prisma/prisma.module.ts

import { Module } from '@nestjs/common';
import { PrismaService } from './prisma.service';

@Module({
  providers: [PrismaService],
  exports: [PrismaService],
})
export class PrismaModule {}
Setting Up Swagger
Install the required dependency by following the command:
npm install --save @nestjs/swagger swagger-ui-express
Now, open the file main.ts and install Swagger by class SwaggerModule.
// src/main.ts

import { NestFactory } from '@nestjs/core';
import { AppModule } from './app.module';
import { SwaggerModule, DocumentBuilder } from '@nestjs/swagger';

async function bootstrap() {
  const app = await NestFactory.create(AppModule);

  const config = new DocumentBuilder()
    .setTitle('Median')
    .setDescription('The Median API description')
    .setVersion('0.1')
    .build();

  const document = SwaggerModule.createDocument(app, config);
  SwaggerModule.setup('api', app, document);

  await app.listen(3000);
}
bootstrap();
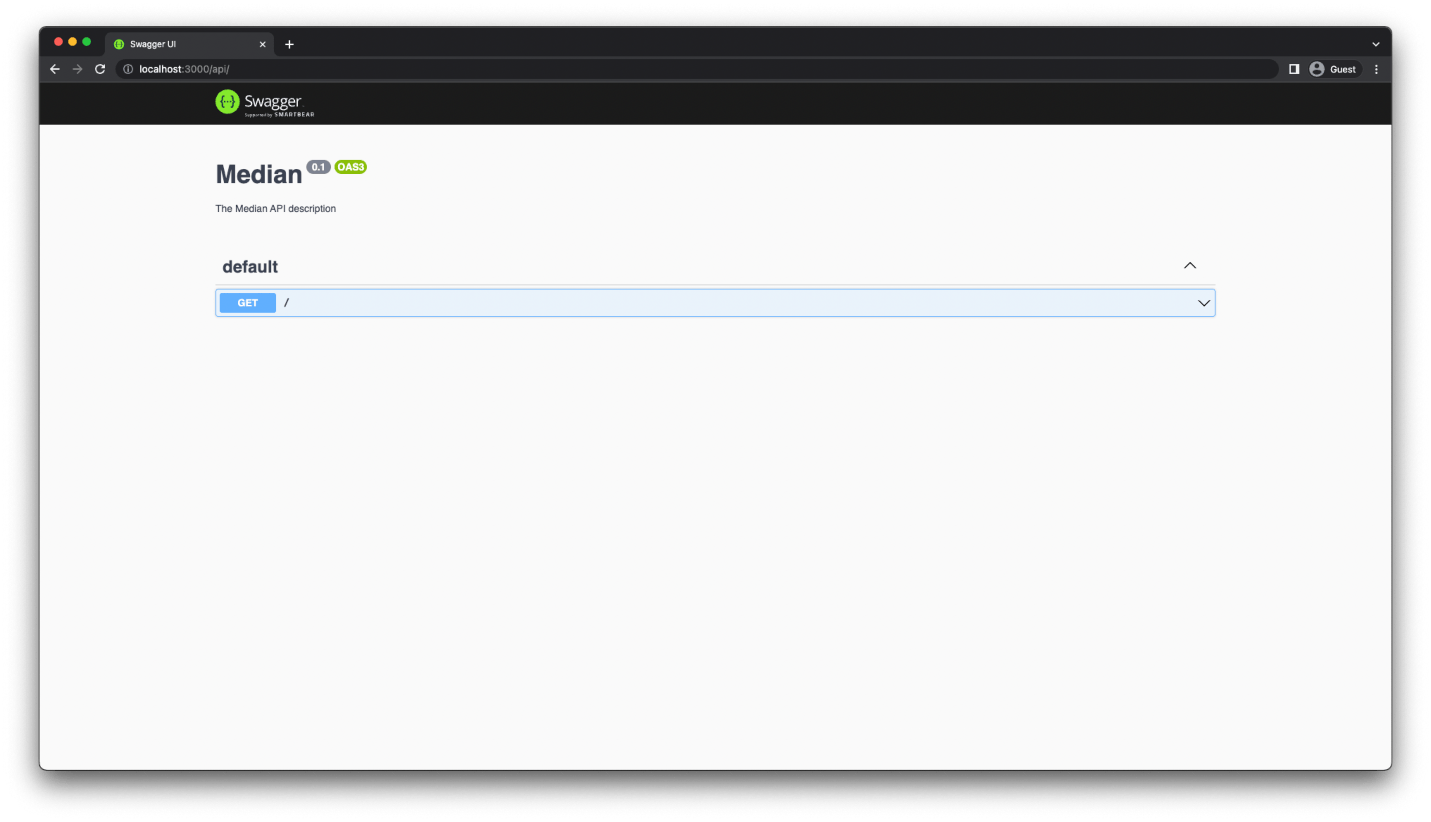
That's it! You can now see a Swagger UI by navigating to http://localhost:3000/api
Article Model: Implementing CRUD Operations
Now, we will add Create, Read, Update and Delete operations for the Article model. First, let's generate REST resources
Generating REST resources
Run the below command in the terminal:
npx nest generates resource
You will see three questions and answer them accordingly like below:
"What name would you like to use for this resource (plural, e.g., "users")"? The answer is "articles."
"What transport layer do you use?" The reply is "REST API."
"Would you like to produce CRUD entrance points?" The answer is "Yes."
Articles Module: Adding Prisma Client to It
Add PrismaModule as an import to access PrismaCleint in the Article module. So, you have to add the below-given imports in ArticlesModule:
// src/articles/articles.module.ts

import { Module } from '@nestjs/common';
import { ArticlesService } from './articles.service';
import { ArticlesController } from './articles.controller';
import { PrismaModule } from 'src/prisma/prisma.module';

@Module({
  controllers: [ArticlesController],
  providers: [ArticlesService],
  imports: [PrismaModule],
})
export class ArticlesModule {}
Now, inject PrismaService in the ArticlesService in the file articles.service.ts:
// src/articles/articles.service.ts

import { Injectable } from '@nestjs/common';
import { CreateArticleDto } from './dto/create-article.dto';
import { UpdateArticleDto } from './dto/update-article.dto';
import { PrismaService } from 'src/prisma/prisma.service';

@Injectable()
export class ArticlesService {
  constructor(private prisma: PrismaService) {}

  // CRUD operations
}
Defining GET /articles endpoint
Now we must update ArticleService.findAll() to get back an array of all published articles in the database:
// src/articles/articles.service.ts

@Injectable()
export class ArticlesService {
  constructor(private prisma: PrismaService) {}

  create(createArticleDto: CreateArticleDto) {
    return 'This action adds a new article';
  }

  findAll() {
-    return `This action returns all articles`;
+    return this.prisma.article.findMany({ where: { published: true } });
  }
To test it, you can go to http://localhost:3000/api and click on GET/articles in the menu.
Defining GET /articles/drafts endpoint
In this, it will create a new router to get all unpublished articles. We must generate the controller router handler for it; hence NestJS did not generate it automatically.
// src/articles/articles.controller.ts

@Controller('articles')
export class ArticlesController {
  constructor(private readonly articlesService: ArticlesService) {}

  @Post()
  create(@Body() createArticleDto: CreateArticleDto) {
    return this.articlesService.create(createArticleDto);
  }

+  @Get('drafts')
+  findDrafts() {
+    return this.articlesService.findDrafts();
+  }

  // ...

}
An editor will show an error like nono function like articlesService.findDrafts() exists. Let's fix this by adding findDrafts in ArticleService.
// src/articles/articles.service.ts

@Injectable()
export class ArticlesService {
  constructor(private prisma: PrismaService) {}

  create(createArticleDto: CreateArticleDto) {
    return 'This action adds a new article';
  }

+  findDrafts() {
+    return this.prisma.article.findMany({ where: { published: false } });
+  }

  // ...

}
Now you can see GET /articles/drafts on the Swagger API page.
Defining GET /articles/:id endpoint
For it, we will findOne in the src/articles/articles.controller.ts file like below:
// src/articles/articles.controller.ts

@Get(':id')
findOne(@Param('id') id: string) {
  return this.articlesService.findOne(+id);
}
Now we will update findOne in the ArticlesService to get/find articles by the given id.
// srcfartictes/articles.service.ts
@Injectable()
export class ArticlesService {
    constructor(private prisma: PrismaService) {}

    create(createArticleDto: CreateArticleDto) {
        return 'This action adds a new article’;
    }

findall() {
    return this.prisma.article.findMany({ where: { published: true } });
}
    findOne(id: number) {
-     return “This action returns a #${id} article;
+     return this.prisma.article.findUnique({ where: { id } });
    }
}
You can check to find an article by id on the localhost URL.
Defining POST /articles endpoint
The handler for POST/articles is** "create."** It looks like the below:
// src/articles/articles.controller.ts

@Post()
create(@Body() createArticleDto: CreateArticleDto) {
  return this.articlesService.create(createArticleDto);
}
You can see that create expects arguments from CreateArticleDto, but it's empty. We will have to add properties to define the request body.
// src/articles/to/create-article.dto.ts

import { ApiProperty } from '@nestjs/swagger';

export class CreateArticleDto {
  @ApiProperty()
  title: String;

  @ApiProperty({ required: false })
  description?: String;

  @ApiProperty()
  body: String;

  @ApiProperty({ required: false, default: false })
  published?: boolean = false;
}
Now, CreateArticleDto is defined on the Swagger API page in **Schemas. **
To create a new article in the database, update the create method in ArticlesService.
// src/articles/articles.service.ts

@Injectable()
export class ArticlesService {
  constructor(private prisma: PrismaService) {
  }

  create(createArticleDto: CreateArticleDto) {
-    return 'This action adds a new article';
+    return this.prisma.article.create({ data: createArticleDto });
  }

  // ...
}
Define PATCH /articles/:id endpoint
It is for updating existing articles, and it's called update. It looks like the following:
// src/articles/articles.controller.ts

@Patch(':id')
update(@Param('id') id: string, @Body() updateArticleDto: UpdateArticleDto) {
  return this.articlesService.update(+id, updateArticleDto);
}
Like before we did, we must update similar services for this method like below:
// src/articles/articles.service.ts

@Injectable()
export class ArticlesService {
  constructor(private prisma: PrismaService) {}

  // ...

  update(id: number, updateArticleDto: UpdateArticleDto) {
-    return `This action reupdates a #${id} article`;
+    return this.prisma.article.update({
+      where: { id },
+      data: updateArticleDto,
+    });
  }

  // ...
}
Article.update will find an article record by providing id and updating it with data of updateArticleDto.
Defining DELETE /articles/:id endpoint
For this endpoint, remove is used for deleting articles. Be sure that it is backend development for medium-like websites. It will be like the following:
// src/articles/articles.controller.ts

@Delete(':id')
remove(@Param('id') id: string) {
  return this.articlesService.remove(+id);
}
Now, like before, let's update other related services too in the Articles.service.ts file.
// src/articles/articles.service.ts

@Injectable()
export class ArticlesService {
  constructor(private prisma: PrismaService) { }

  // ...

  remove(id: number) {
-    return `This action deletes a #${id} article`;
+    return this.prisma.article.delete({ where: { id } });
  }
}
Now, the API is nearly ready with fine backend development techniques.
Grouping endpoints in Swagger
We will add a @APITags decorator in the ArticleController class for grouping all endpoints composed.
// src/articles/articles.controller.ts

import { ApiTags } from '@nestjs/swagger';

@Controller('articles')
@ApiTags('articles')
export class ArticlesController {
  // ...
}
Updating Swagger response types
We will have to fill in the description, as Swagger doesn't know the responses and their types for all endpoints. Let's fix a few decorators now.
First, we will define an entity that Swagger can use to identify the shape of the returned object. Let's update the ArticleEntity class in the file articles.entity.ts.
// src/articles/entities/article.entity.ts

import { Article } from '@prisma/client';
import { ApiProperty } from '@nestjs/swagger';

export class ArticleEntity implements Article {
  @ApiProperty()
  id: number;

  @ApiProperty()
  title: String;

  @ApiProperty({ required: false, nullable: true })
  description: string | null;

  @ApiProperty()
  body: String;

  @ApiProperty()
  published: boolean;

  @ApiProperty()
  createdAt: Date;

  @ApiProperty()
  updatedAt: Date;
}
Now we have to annotate controller router handlers with the correct response types. For that purpose, NestJS has a set of decorators to do so.
// src/articles/articles.controller.ts

+import { ApiCreatedResponse, ApiOkResponse, ApiTags } from '@nestjs/swagger';
+import { ArticleEntity } from './entities/article.entity';

@Controller('articles')
@ApiTags('articles')
export class ArticlesController {
  constructor(private readonly articlesService: ArticlesService) {}

  @Post()
+ @ApiCreatedResponse({ type: ArticleEntity })
  create(@Body() createArticleDto: CreateArticleDto) {
    return this.articlesService.create(createArticleDto);
  }

  @Get()
+ @ApiOkResponse({ type: ArticleEntity, isArray: true })
  findAll() {
    return this.articlesService.findAll();
  }

  @Get('drafts')
+ @ApiOkResponse({ type: ArticleEntity, isArray: true })
  findDrafts() {
    return this.articlesService.findDrafts();
  }

  @Get(':id')
+ @ApiOkResponse({ type: ArticleEntity })
  findOne(@Param('id') id: string) {
    return this.articlesService.findOne(+id);
  }

  @Patch(':id')
+ @ApiOkResponse({ type: ArticleEntity })
  update(@Param('id') id: string, @Body() updateArticleDto: UpdateArticleDto) {
    return this.articlesService.update(+id, updateArticleDto);
  }

  @Delete(':id')
+ @ApiOkResponse({ type: ArticleEntity })
  remove(@Param('id') id: string) {
    return this.articlesService.remove(+id);
  }
}
As mentioned above, we have added all endpoints like GET, PATCH, POST, TYPE, and DELETE to specify return types. If you see Swagger now, you can see all the defined endpoints on the API page.
Final Remarks
Yep, that's it. We have built a REST API using NestJS and Prismaintegrated Prisma into the NestJS project and documented the REST API using Swagger and OpenAPI.
This stack is incredibly productive for quickly creating well-structured, type-safe, and maintainable backend development. I hope you gained valuable knowledge in building the REST API. Comment below if you need other tutorials as well. Thanks for reading.