


A cross-platform flutter app developers can build native-looking Android and iOS apps with a single codebase. That's why the flutter application development market is gaining popularity for its fast development speed and attractive UI.
A few options are available if you're looking to add a payment gateway integration to your Flutter app. This blog post will look at integrating the popular Stripe payment gateway into a Flutter app.
Well, you can integrate any of the payment gateways into Flutter, like:
Razorpay
Stripe
Google Pay
Apple Pay
Cashfree
Paytm
PayG
Paystake
Flutter is changing and improving; get to know what it acquired in 2022 and the future: Future of Flutter in 2022 & Beyond
In this blog, I am doing payment gateway integration of Stripe as an example.
Stripe Payment Gateway integration in Flutter
We all know that Stripe is a global payment platform for enterprises and individuals sending and receiving payments. It manages all the security, fees, and deposits, including credit card payments.
Stripe Features
Integratable Checkout
Various Currency Payouts
Dispute Resolution
Payout Period
Toolset for Custom UI
How to do payment gateway integration of Stripe in Flutter (Step by Step)
**Step 1: **Go to Dashboard > Sign in Step 2: Select any mode (Live or test) for the API key Step 3: Go to Dashboard > API keys > Generate Key (You have to make separate API Keys for live and test mode too) (Implementation) Complete steps are given below Step 4: Add dependencies Step 5: Import **Step 6: **Run flutter packages in your app's root directory Step 7: Minimum version requirement check **Step 8: **Turn on MultiDex Step 6: Enable Android
Implementation of Stripe
Step 4: Add dependencies
In Pubspec---yaml file,
add dependencies:
stripe_payment: ^1.1.4
Step 5: Importing
Here we are importing stripe_payment.dart file.
import 'package:stripe_payment/stripe_payment.dart';
Step 6: In the App's Root directory, run flutter packages
Step 7: Check/Change Minimum Version Requirement
Change the following things in android/app/build.gradle file
minSdkVersion 19
compileSdkVersion 28
Step 8: Enable MultiDex
In the file app/build. gradle turn on Multidex.
android {
    compileSdkVersion 28
.....
    defaultConfig {
        // TODO: Specify your own unique Application ID (https://developer.android.com/studio/build/application-id.html).
        applicationId "com.example.flutterstripepaymentdemo"
        minSdkVersion 19
        targetSdkVersion 28
        versionCode flutterVersionCode.toInteger()
        versionName flutterVersionName
        multiDexEnabled true
    }
Now, add MultiDex dependencies.
dependencies {
    implementation "org.jetbrains.kotlin:kotlin-stdlib-jdk7:$kotlin_version"
    implementation 'com.android.support:multidex:1.0.3'
}
Step 9: Enable AndoridX
Add the below code in the file gradle. Properties
org.gradle.jvmargs=-Xmx1536M
android.enableR8=true
android.useAndroidX=true
android.enableJetifier=true
How To Implement Code in Dart File?
Quick flow steps of implementing code:
Setting up options
Creating source
Creating token with a card form
Creating token with card
Confirming payment intent
Setting up for native payment like android pay or apple pay
Setting up options
We will need a secret key and publishable key. So, first, we will log in to stripe and change the mode to test mode. The Flutter app will be connected to the stripe account using the publishable key and merchant id. To add the stripe_payment package, you can go here.
Now, let's connect the Stripe with the Flutter app by the below code.
@override
initState() {
  super.initState();
  StripePayment.setOptions(
      StripeOptions(
         publishableKey:"YOUR_PUBLISHABLE_KEY"
          merchantId: "YOUR_MERCHANT_ID"
          androidPayMode: 'test'
));
}
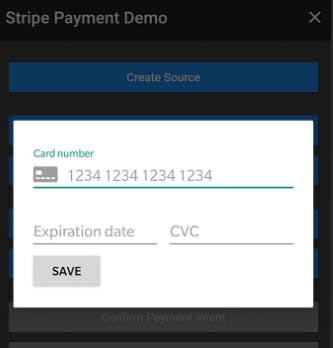
Creating Source
Create Source with Params
Create a Stripe project and account
To integrate the flutter application with the Stripe payment gateway, retrieve a publishable key from the Stripe dashboard and use it there.

Your Payment Source object will also be displayed when you push the RaisedButton. Then, visit your browser's Stripe test payment page to authorize a transaction.
Creating Token with Card Form
In this method/step, card details will be saved for payments.
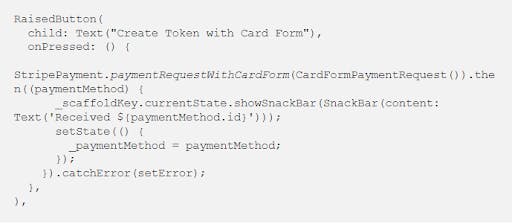
A card form popup will be shown when you press RaisedButton.
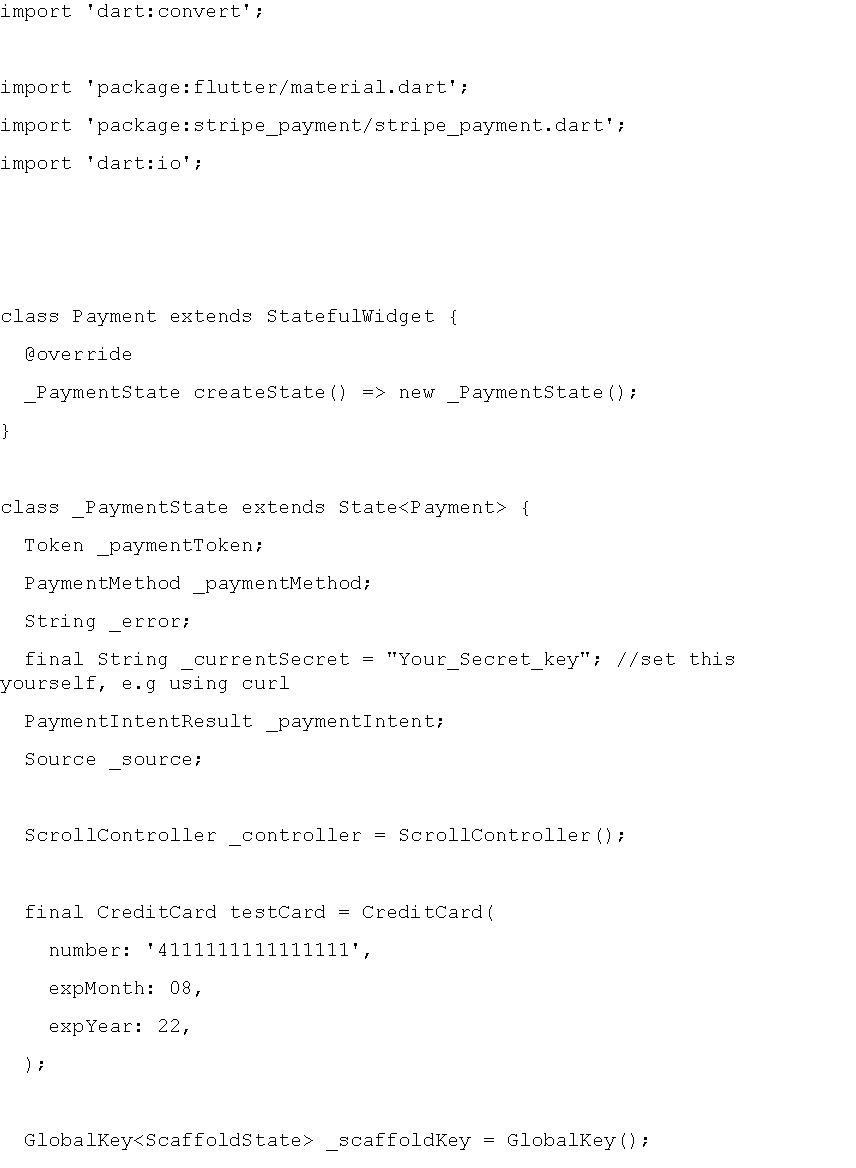
Creating Token with Card
We will try to make a test card like the one below for demo purposes.
final CreditCard testCard = CreditCard(
  number: '9111111119111111',
  expMonth: 12,
  expYear: 26,
);
Now, if you press the RaisedButton, the card details will be shown with Id, country code, and token id.

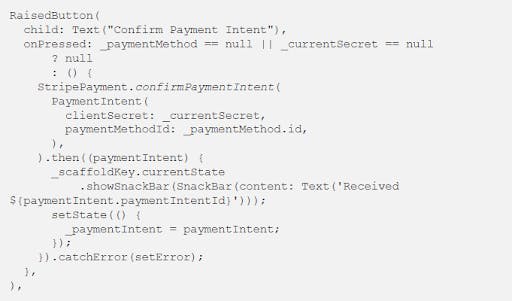
Confirming Payment Intent
In this step/method, we will add a secret key from a stripe account like the one below.
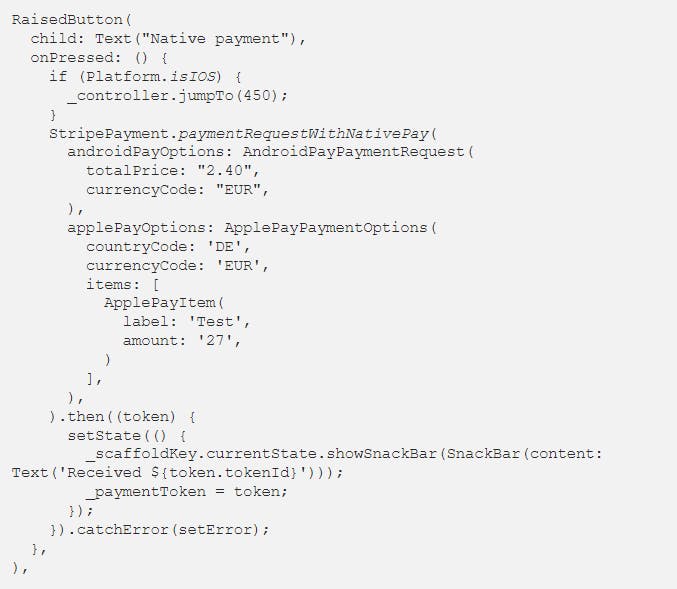
Native Payment
For Native payments, add merchant ids. It is applicable for Android pay and Apple pay.
The whole code file:
Well, this was all about Payment Gateway Integration of Stripe in Flutter. The same you can do with PayPal with Flutter in Flutter App Development. If you are in flutter application development and want to know exciting things about future Flutter, head to this blog: Future of Flutter in 2022 & Beyond
Final Words
This blog was about Payment Gateway Integration with Flutter in Flutter app development. This blog provided a step-by-step guide for stripe integration in Flutter. Suppose you want the same guide on PayPal, RazorPay, Braintree, and Flutterwave to Payment Gateway Integration with Flutter. Just comment below. I hope you liked reading it!